This great photo booth tip was written by one of our great members of the Photo Booth Owners Community Darren Wright owner of Buzz KC Photo. In this how-to Darren shares his technique for hanging curtains on a pop-up canopy commonly used in the industry.
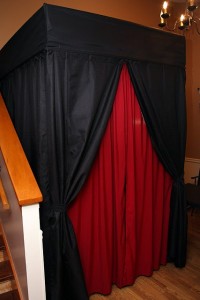
Over the years Darren has received many compliments on his booth and how nicely it looks with the curtains. Here is the technique described in his words.
I don't think I have shown anyone how we went about hanging them. We use the canopy top that came with our canopy, I've just removed the center pole that pushes up the peak as its setup.
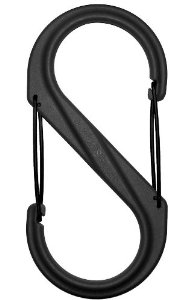
While building ours, I spend a couple of hours in the hardware isle looking for solutions to hang rods from at the local blue borg (Lowes). What I found were some S-biner clips. I bought a dozen of them, some eyelet bolts with nuts to match, and some 1/2″ electrical EMT conduit.
I cut 4 pieces of conduit to length about 1/4″ – 1/2″ less than the distance between the legs on my canopy. I drilled vertical holes 2″ from each end (holes should be parallel to the holes on the opposite end) for the eyelet bolts to go through and locked down with nuts and locktite.
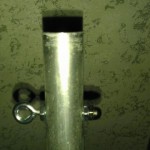
The “S” hooks clip over the framework at each end, then slip the eyelet onto a hook at each end.

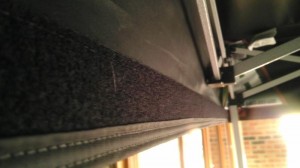
This is all the outer rods hung in place without curtains.

I also cut 4 more poles, 2″ shorter than the first set, which are used to hang inside curtains on the same hooks used by the outside set. For these poles, drill the eyelet holes 1″ from each end. The shorter pole will give some room to have the curtains not bunch as bad in the corners.
My curtains were simply $9 a set 84″ curtains from Walmart, the curtain hoop just needs to be big enough for the curtain rod to slip through without removing the eyelets. In some cases, we had to hang the curtains upside down as the bottom hem was larger and simply cut the stitches at the ends to let the rod slide through.
On the equipment side, we had a longer curtain on each side of the equipment and shorter one over the top of it cut to length and hemmed to close the gaps.
One thing I did was to cut small slits for the eyelet heads to slip out the top of the curtain, so the curtain could be taken all the way to the end or further.
My front and back curtains actually had those slits for the eyelets about 10″ from one end for each side of what I would consider the entrance and the opposite side wall. That extra 10″ of overhang allowed me to wrap the curtain around the pole to hide it. I used some small binder clips/clothe pins to tuck the extra away, but some sewn on Velcro may be a good choice.
To hide the framework around the ceiling, we have a 5′ x 5′ white sheet with Velcro on the corners that sticks to the lower side. Not only does it hide the framework, but it gives a great bounce for lighting and makes a dramatic difference.
Now the canopy top does have Velcro around it. I've bought the factory sides for it that have the zippered corners. We only used them for outdoor events where the light would blow the curtains and allow light to seep in wreaking havoc on the camera. We still used the smaller curtain rods to hang inside curtains and backdrop from as well as our “ceiling” piece.
You could do Velcro hook on the curtains, but keep in mind to allow some curtain to wrap the legs to hide them.
Have thoughts or questions? Leave a comment or join the discussion in the photo booth forums.
This great photo booth tip was written by Darren Wright, the owner of Buzz KC Photo and talk photo booths. Buzz KC Photo serves the greater Kansas City metropolitan area in Missouri.
